If you want to build album galleries in WordPress using Re Gallery, there are two clean and flexible ways to structure them.
Both approaches let you create a grid of album thumbnails, the difference is what happens after the click.
Let’s break them down clearly.
Version 1: Classic Photo Album Layout (Album opens a gallery page)
This is the classic and most structured way to create albums.
How It Works
1️⃣ Create one gallery for each album
Each album (for example: “Weddings” or “Travel”) has its own gallery with photos inside.
2️⃣ Create one main Albums page
This page shows all your albums as clickable thumbnails.
3️⃣ Clicking an album opens its photo gallery
When someone clicks an album, they’re taken to a page with all the photos from that album.
4️⃣ Photos open in a full-screen slideshow
Clicking any photo opens it in a large, clean slideshow where users can browse all images easily.
Step-by-Step Setup
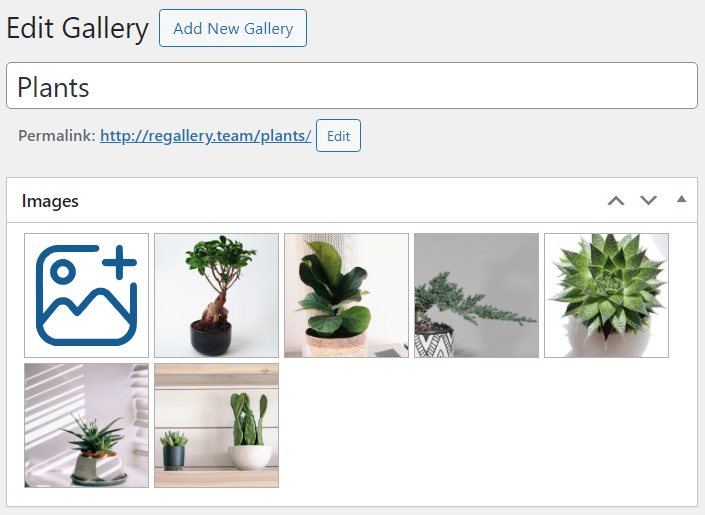
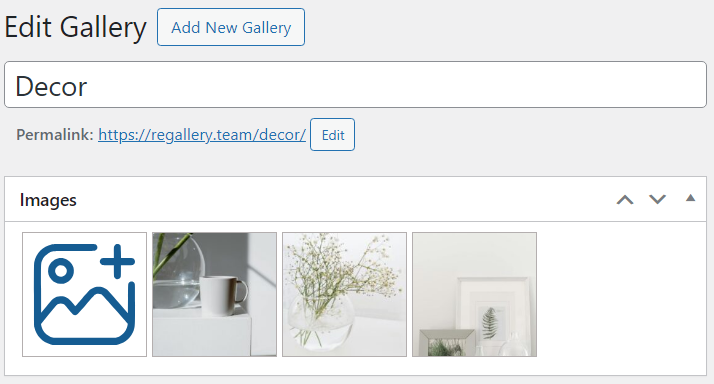
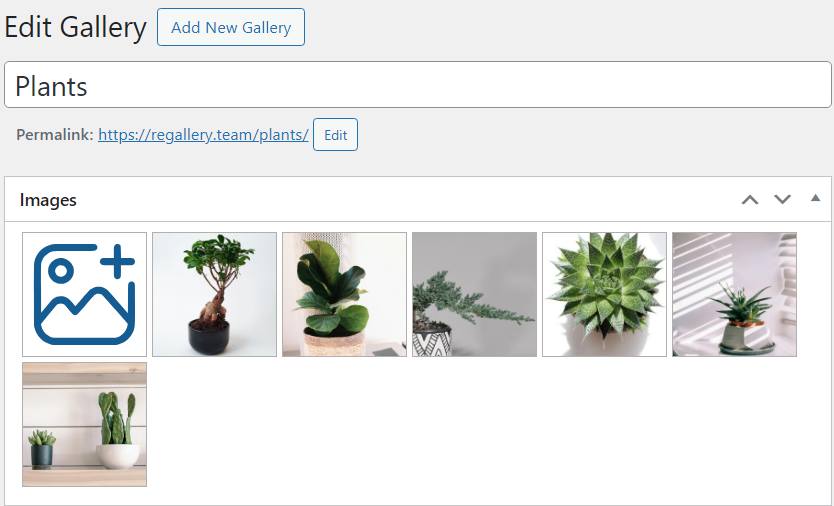
Step 1: Create Individual Galleries
Create one gallery for each album.
For example:
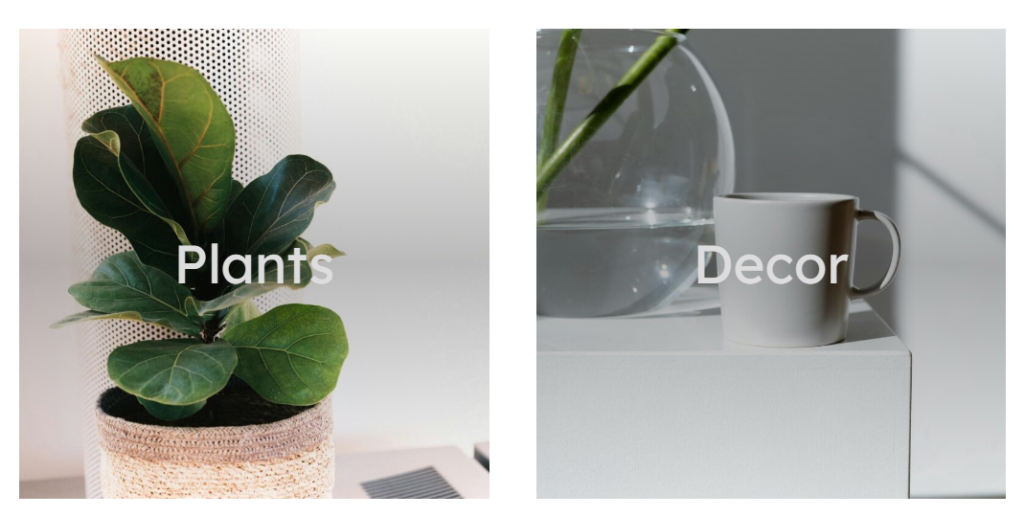
- Plants
- Decor
Add the images that belong to that galleries.
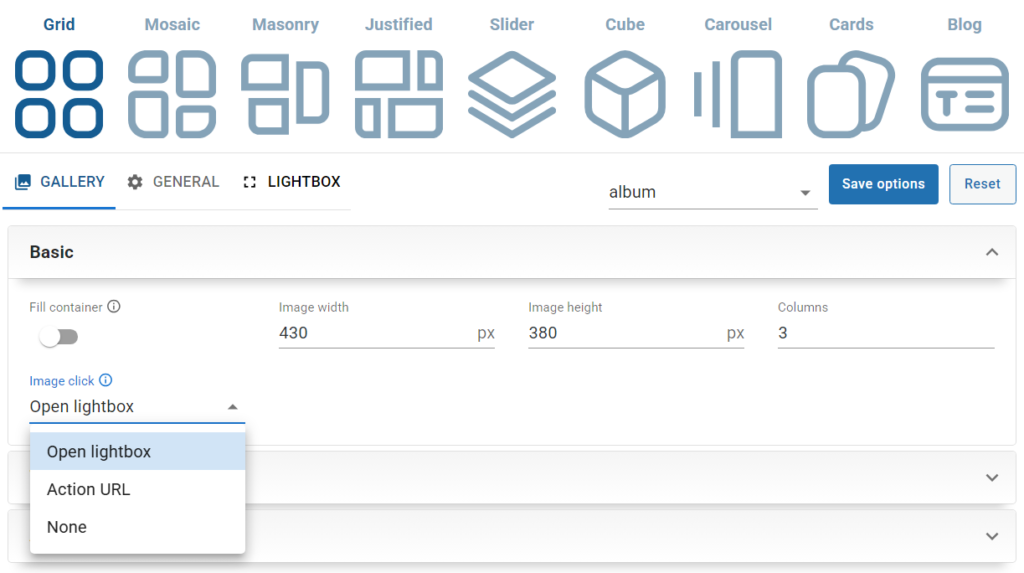
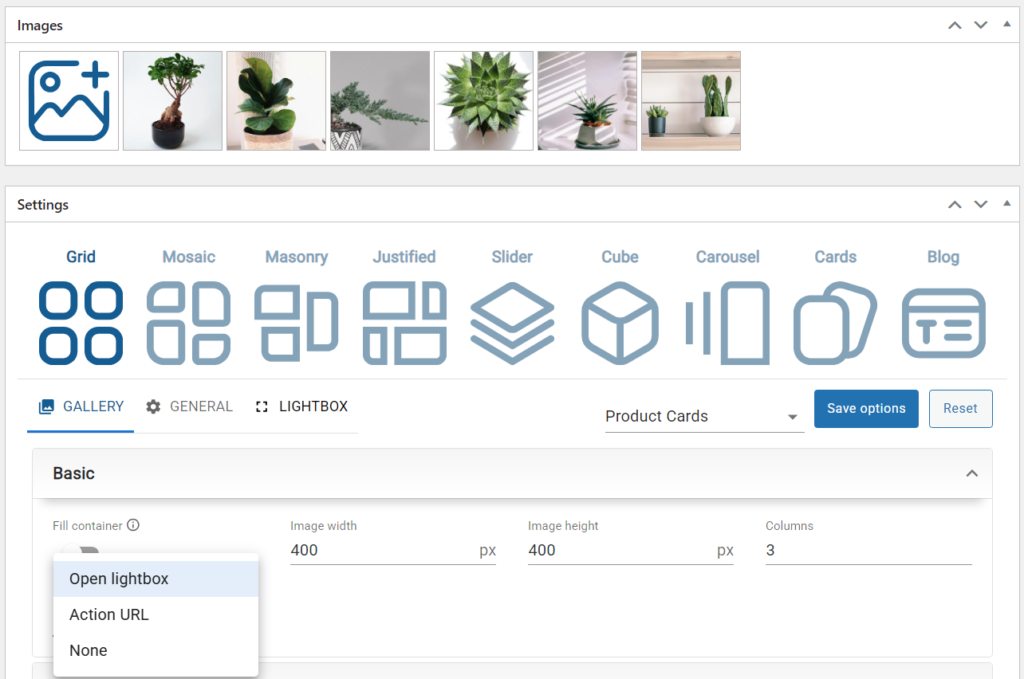
In the gallery settings:
- Choose how you want your gallery to look (Grid, Slider, Cube, or other layouts)
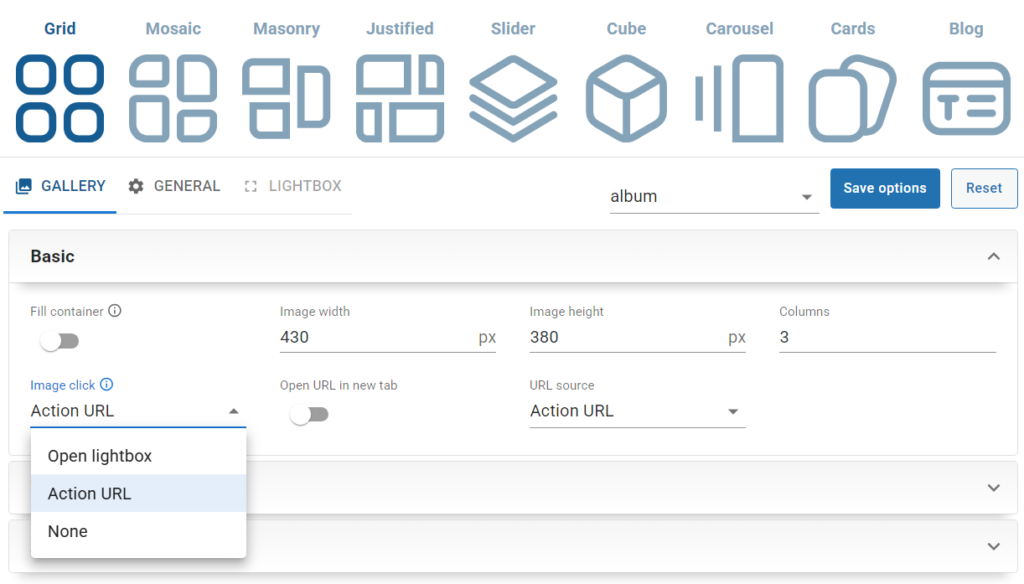
- Set Image Click → Open Lightbox
Publish the galleries.
Step 2: Create the Albums Overview Page
Create one gallery as an album of existing galleries. Add one image from every existing gallery. You can use any of Re Gallery layouts.
1️⃣ Set image clicks to the Action URL.
Choose Action URL as Image click.
2️⃣ Edit each image
Open an image’s settings.

3️⃣ Scroll to the bottom of the settings panel
On the right side, scroll down until you see the Action URL field.
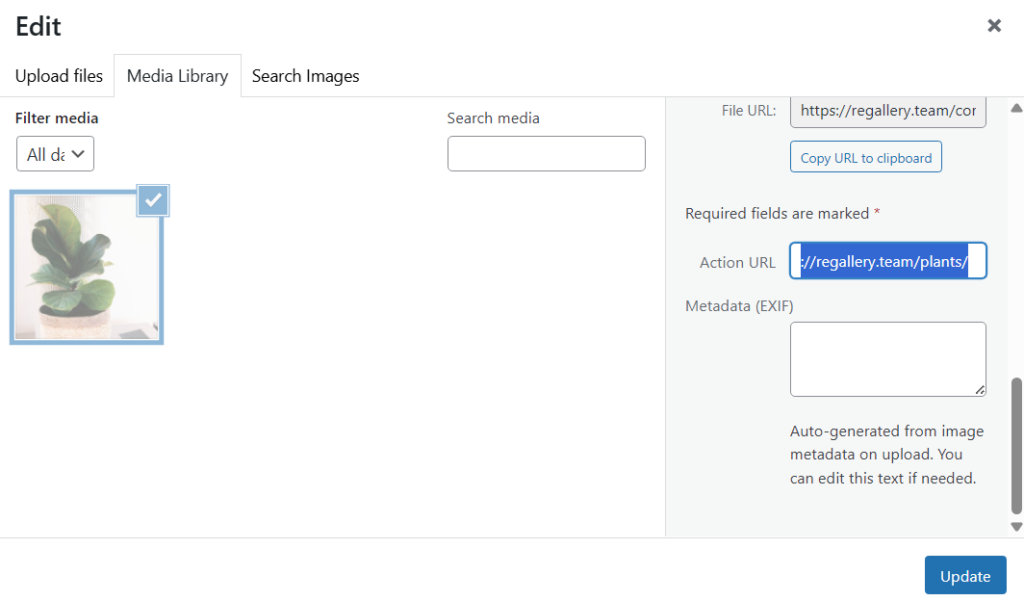
4️⃣ Add the correct gallery link
Paste the gallery page link that matches that image. To grab the right URL go to the created galleries Plants and copy the page URL.
Do the same for the second gallery also.
➡️ Each image will now open its corresponding gallery when clicked.
Now your Albums page acts as the navigation hub.
When to Use This Version
This method is best when:
- You want each album to have its own URL
- You care about SEO per album
- You want flexibility to add text, descriptions, or metadata to each album
- You prefer clean separation between albums
Note that both album and galleries in the album can have any layout existing in Re Gallery!
Version 2: Album cover photos that open photos in a full-screen slideshow
This method keeps everything on one single page.
Instead of linking to separate gallery pages, each thumbnail opens a Lightbox slideshow directly.
No intermediate gallery page.
How It Works
1️⃣ Create a page for an album
You see a page with image thumbnails.
2️⃣ Create one gallery for each album
Each thumbnail represents an album.
3️⃣ Clicking an album opens the slideshow
When you click a thumbnail, the photos from that album open in a large, full-screen slideshow.
Step-by-Step Setup
Create Separate Galleries
You still need to create one gallery per album.
Add images to each gallery
Upload or select the images you want for each album.
Choose how the gallery looks
Pick a Grid as the gallery layout.
Adjust the image dimensions: set Image width and height.
Image click set to Open lightbox (This lets visitors view images in a large, clean viewer).
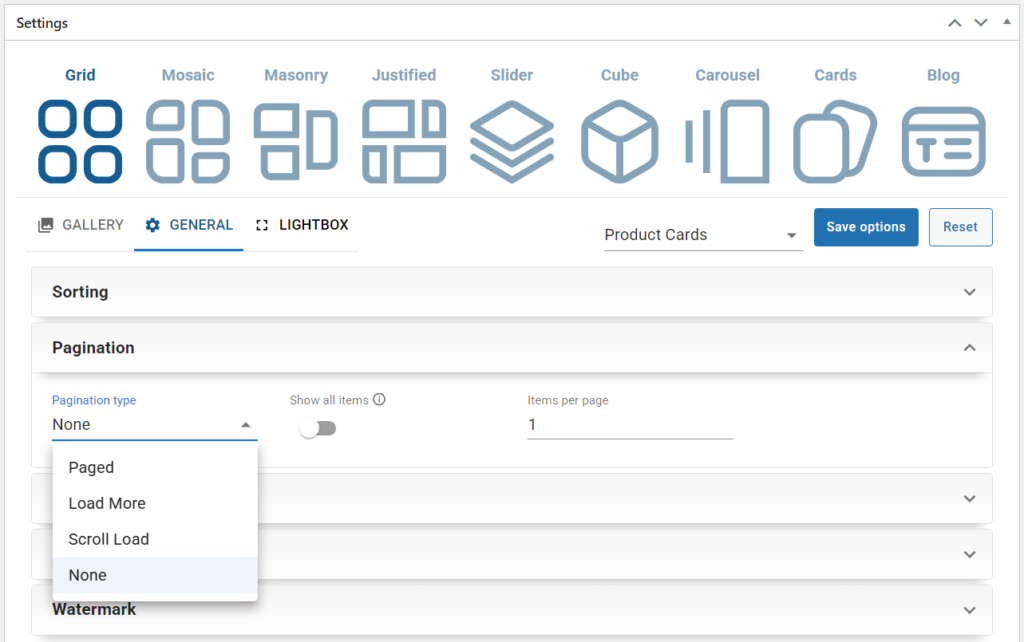
Choose None as Pagination type, disable Show all items, and set Items per page to 1.
➡️ This way, the gallery looks like a single album cover, but clicking it opens the full photo collection.
Create a page with album covers
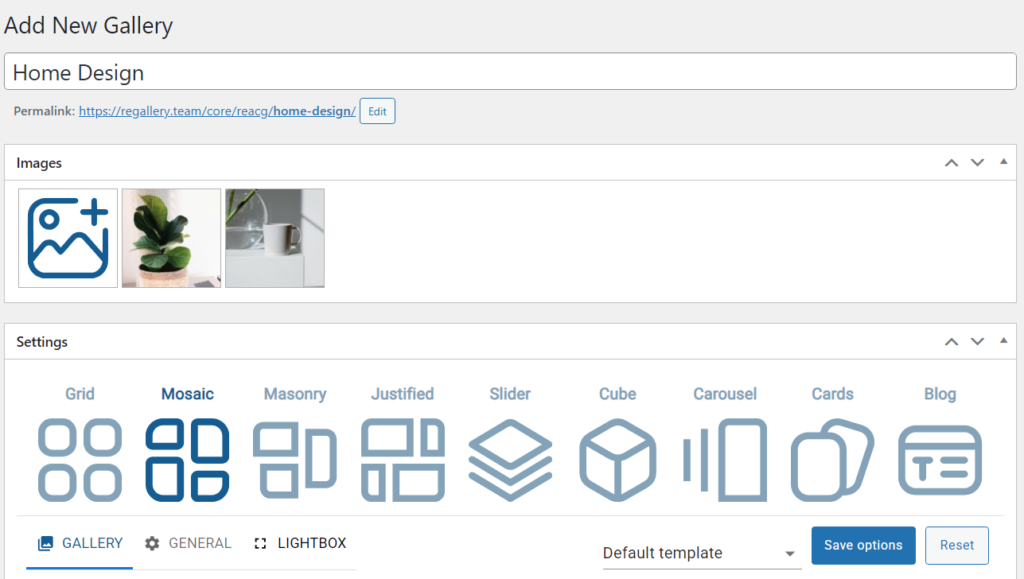
1️⃣ Create a new page
For example, name it Home Design.
2️⃣ Add one gallery for each album
Place multiple Re Gallery blocks on the page, one gallery per album.
(You can do this with any page builder you’re using.)
3️⃣ Each gallery shows one album cover
Each gallery appears as a single image that represents an album.
4️⃣ Clicking an album opens the photos instantly
When someone clicks an album cover, the photos open in a large, full-screen slideshow.
➡️ Everything happens on the same page – no extra pages needed.
Which Version Should You Choose?
Choose Version 1 if:
- You want structured albums with separate URLs
- You want better SEO
- You want album descriptions and standalone pages
Choose Version 2 if:
- You want a smooth, modern UX
- You prefer everything on one page
- You want fewer page loads
- Albums are purely visual
Final Thoughts
Both methods are valid and professional.
Version 1 is more traditional and structured.
Version 2 is more dynamic and modern.
The good news is that with Re Gallery, you can switch between them depending on the project.